Fix Camera Shaking Issue on iPhone 14 Pro and 14 Pro Max
Before going for the solutions, let’s briefly discuss the possible culprits that might be causing the camera to shake on your iPhone 14 Pro or 14 Pro Max.
What Causes My iPhone 14 Pro’s Camera to Shake?
Having gone into the details of the problem, I think there are a couple of things that have stood out for me. The unexpected camera shaking problem could be not only a hardware failure but also a software issue. Hence, you should look at it from two different angles. As for pinpointing the possible villains, you should take into account these four critical things such as:
Exposure to high amplitude vibrationsOutdated appsSoftware bugDamage to the camera lenses
Many users have reported that the iPhone’s camera starts shaking when they use the camera in third-party apps like Snapchat, TikTok, Instagram, and more. Some users have even stated that they hear grinding or bugging noise coming from the camera lenses when attempting to use the camera in these third-party apps. Now, it’s time to look for ways to troubleshoot each one of these culprits.
1. Remove the Case from Your iPhone
Many cheap and rugged cases do not feature precise cutouts for the camera bump. As a result, they tend to hinder the camera lenses from functioning properly. Therefore, remove the case from your device and then try using the camera.
2. Clean the Camera Lens
Believe it or not, the pileup of dust and smudge also tend to come in the way of camera lenses and start causing issues. Therefore, use a soft and lint-free cloth to clean the camera lenses.
3. Reboot Your iPhone
Many a time, you can get rid of a weird issue just by rebooting your device. So, we are going to count on it to solve the issue.
Just press and hold the volume up or down button and the side button at once. Then, drag the power off slider to shut down your device. After waiting for a few moments, press the side button to reboot your iPhone.
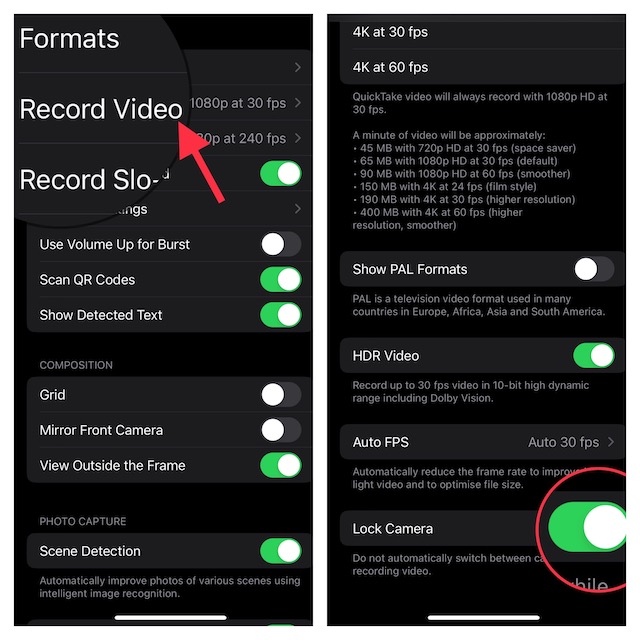
4. Lock Your iPhone 14 Pro’s Camera
I don’t think many of you would be aware that modern versions of iOS offer a way to lock the camera. It stops the camera from switching automatically.
Head over to the Settings app on your iPhone -> Camera -> Record Video -> Scroll down to the bottom and then turn on the toggle for Lock Camera.
5. Update Apps on Your iPhone
If the third-party apps where you are facing the camera shaking issue haven’t been updated, the outdated version might be at fault. Thus, try updating the problematic apps.
Open the App Store -> your profile. Now, you have the option to update all apps or update specific apps.
Once you have updated the app, open it and then try using the camera to see if you have sorted out the problem. Just in case the camera continues to shake or make noise, delete and reinstall the problematic app. A fresh install often works wonders in fixing an app-related problem.
6. Force Reset Your iPhone
So, how long can you ignore a solution that has a great track record in fixing a common issue? As you may have already guessed, I’m talking about the force restart. Hence, go for it.
Press and quickly release the volume up button. Then, press and quickly release the volume down button. Next, hold down the side button until you see the Apple logo on the screen. Now, open the same app where you have faced the problem and try to use the camera to find out if the problem is gone.
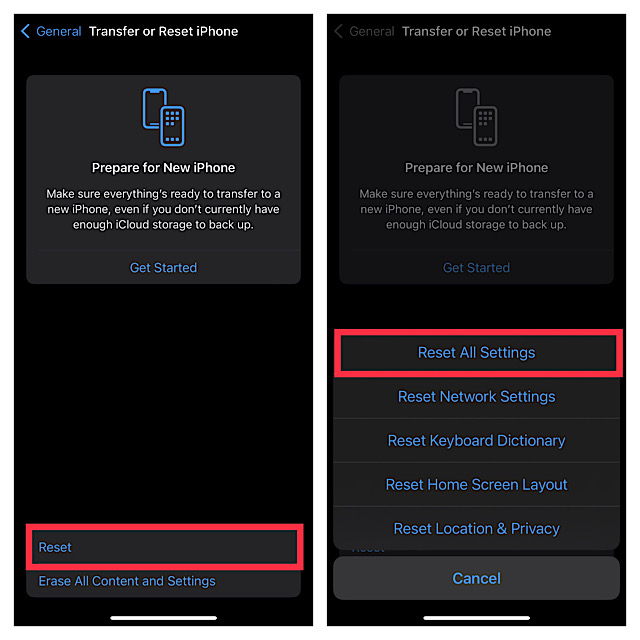
7. Factory Reset Your iPhone
Factory reset is my go-to problem solver, especially when a weird issue seems to haunt my device. Knowing how trusted it has been, I’m going to give it a shot as well.
Open the Settings app -> General -> Transfer or Reset iPhone -> Reset -> Reset All Settings. Next, input your device passcode and hit Reset All Settings again in the popup to confirm the action.
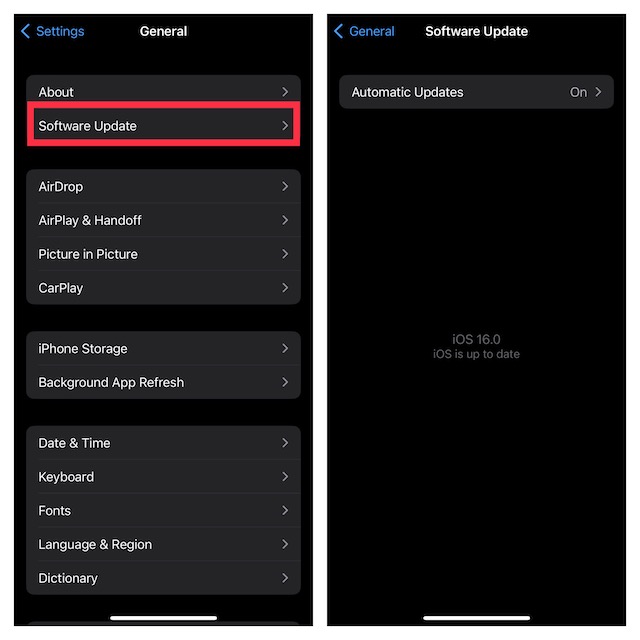
8. Update Software on Your iPhone
If the camera app of your brand new iPhone 14 Pro continues to ill-function, there is a good chance that the problem could be due to a bug. And in this situation, a software bug is undoubtedly your go-to troubleshooter.
Navigate to the Settings app on your iPhone -> General -> Software Update.
9. Restore Your iPhone As New
Restoring is widely considered to be the nuclear solution as it is capable of fixing complex issues with consummate ease. However, you must proceed with it carefully, only after backing up your iPhone. Restore Your iPhone With Computer
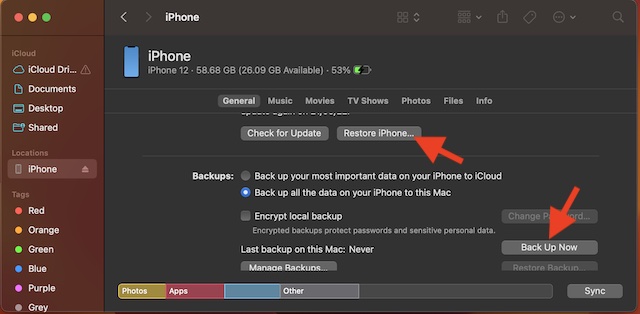
Use a USB cable to connect your iPhone to your computer -> open Finder/iTunes -> select your device. Then, back up your device. Once the backup is done, click Restore iPhone.
Restore Your iPhone Without Computer
Go to the Settings app -> Apple ID banner -> iCloud -> iCloud Backup and then back up your iPhone to iCloud. After that, head over to the Settings app -> General -> Transfer or Reset iPhone -> Erase All Content and Settings. Then after, you will need to set up your device again and restore the most recent backup.
10. If Nothing Works, Contact Apple Support
No luck as yet? If luck has not smiled upon you as yet, you should contact Apple Support at the earliest. There is a high chance that the problem could be due to a hardware failure.
Fixed the Camera Shaking Problem on iPhone 14 Pro and 14 Pro Max
And that’s it about! I guess the camera of your all-new iPhone is back on track. Now that you have gotten the better of the camera grinding problem, let me know the hack that has resolved the issue. Is it the simple reboot or the factory reset that has worked for you? Or, did you have to go for the last resort? Your feedback is invaluable. Therefore, be sure to shoot it in the comments below. Read more: 10 Common iOS 16 Problems and Their Solutions