Your graphic card is behind this display or screen solution settings. If you have installed the latest and proper drive offered by the manufacturer, then Windows 11 automatically detect the best display setting depending on the device screen. Recommended display settings from your graphic card aren’t user-friendly all the problem. Maybe texts are tiny, not sharper, or something that you want.
How to Change Display or Screen Resolution in Windows 11
Windows 11 offers various screen resolutions that users can apply. Applying display resolution is super easy in Windows 11 and in this blog post, we will cover all the possible ways on how to do that. So let’s start with the first method:
Change Display Resolution using Settings app
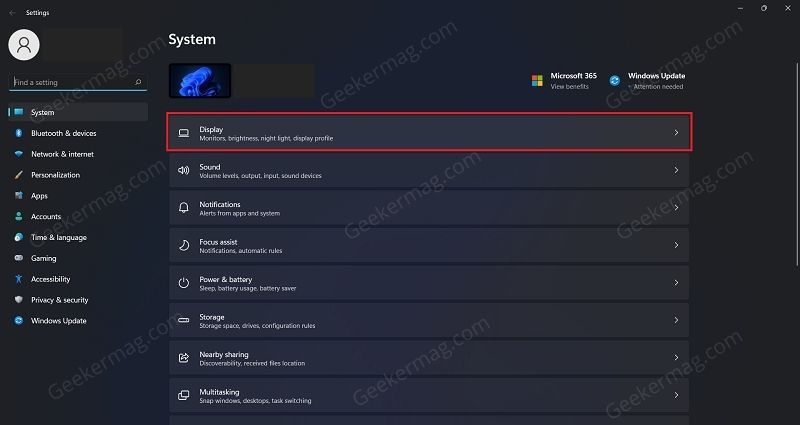
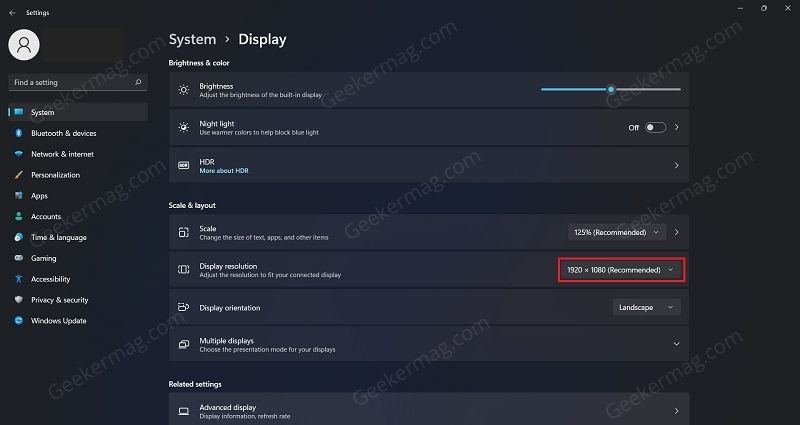
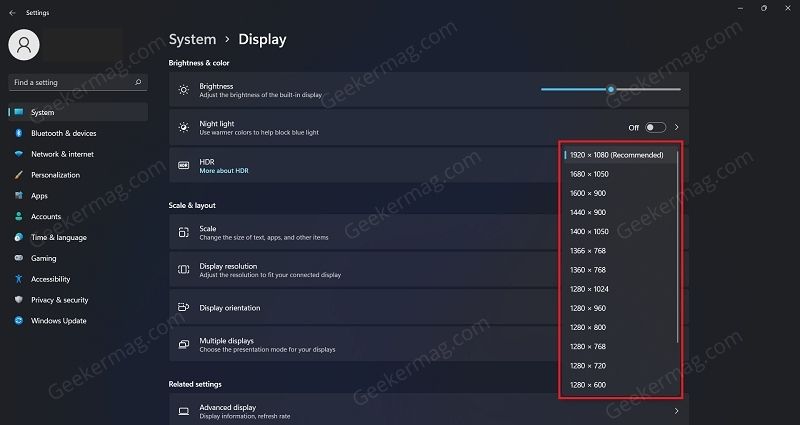
Oen the Settings app on your PC by pressing the Windows + I key combo. On the right side of the Settings app, click on the Display option. Now, click on the drop-down menu next to the Display Resolution. Select the appropriate screen resolution from the drop-down menu. You will be asked whether you want to keep the changes or not. Click on Keep changes to save the changes you made.
Change Display Resolution Using Advanced Display Options
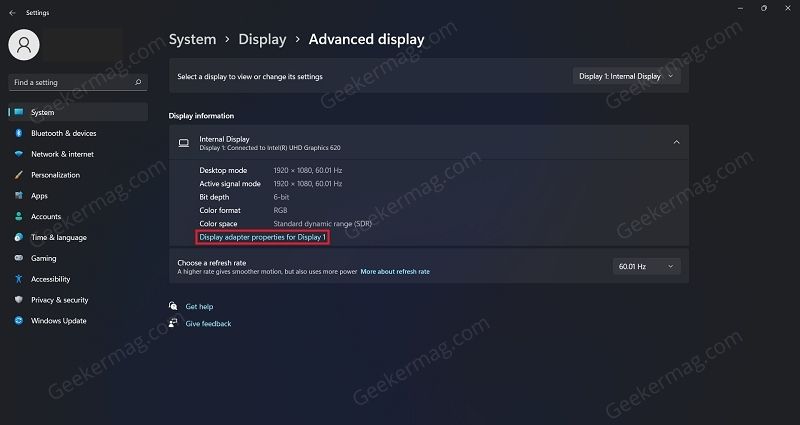
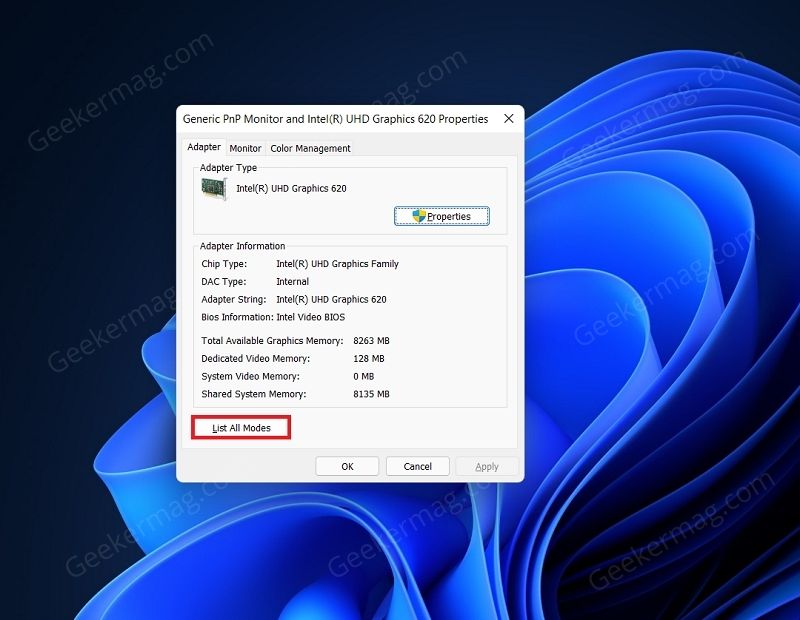
Launch the Settings app in Windows 11. Select the System tab and then select the Display option on the right side of the Settings app. Scroll down to the Related Settings section, and click on Advanced display here. On the next screen, select the display for which you want to change the resolution and then click on Display adapter properties for display. You will be headed to the display adapter properties window. Click on the List All Modes button in the Adapter tap. On the next window, select the resolution, and then click on OK. Next, on the adapter properties window, click on Apply and then click on OK. When asked whether you want to keep the changes, click on the Keep changes option.
Change Screen Resolution Using Intel Graphics Command Center
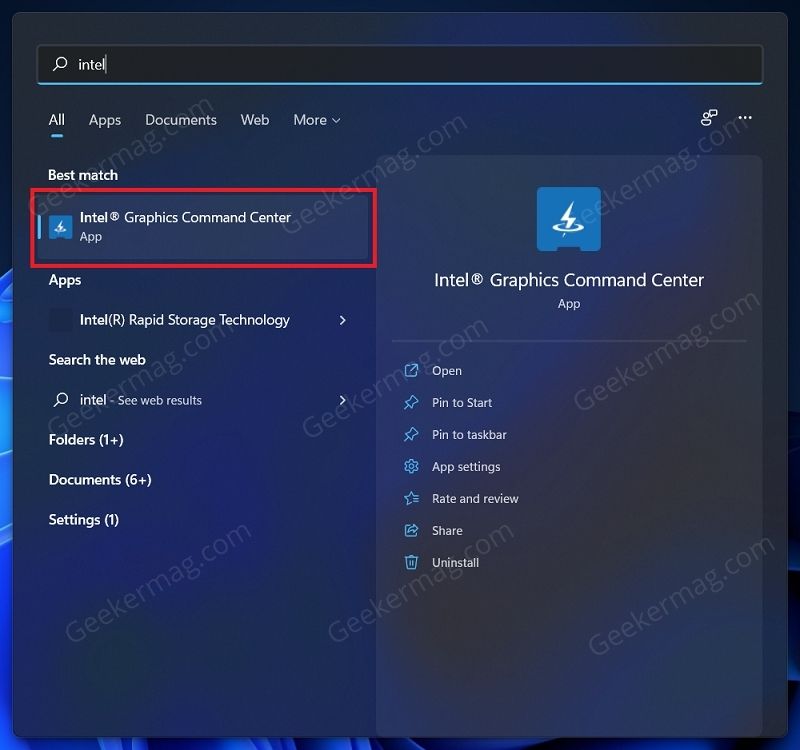
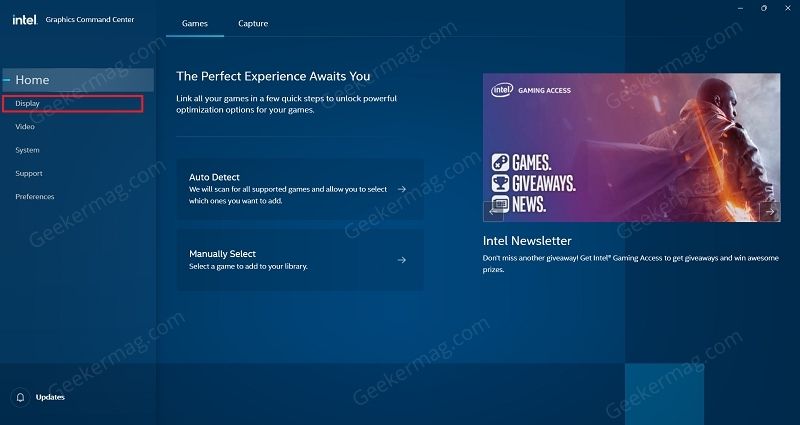
If your PC has an Intel graphics card, then you will be able to change the screen resolution by using the Intel graphics command center. Press the Search icon and in the search bar, search for Intel Graphics Command Center. Click on the Intel Graphics Command Center app in the search result to open it. Click on the Display tab in the left sidebar of the Intel Graphics Command Center app. Now, click on the drop-down menu under the Resolution section. From the drop-down menu select the appropriate resolution, and the resolution will be set.
Change Screen Resolution Using NVIDIA Control Panel
In case, your device has a graphic card from NVIDIA, then they offer a handy application called NVIDIA Control Panel using which users can change screen resolution. Here’s how you can do that: Usually, the NVIDIA Control app comes preinstalled if your device’s GPU is from NVIDIA. In case, it’s missing, then download it from here. Click on the Search icon available on the Taskbar, then type NVIDIA Control Panel and when it appears in results, click to open it. Now on the left sidebar, click on the Change resolution option under the Display section. On the right side, select the display for which you want to change the resolution. Under the Resolution section, select the resolution you want to switch to. Once done, click on Apply button. When asked to confirm changes, click on Apply Changes and your changes will be saved. So these are possible ways on how you can change the screen resolution or display resolution in Windows 11. Don’t forget to tell us which method you use to change display settings in the comments.
