Fortunately, I was not the only one to be on the wrong end of the problem. So, I thought it would be better to create an in-depth piece about the viable tips to resolve WiFi issues in macOS Ventura. If this problem has been haunting you as well, let’s try out these 9 best ways to fix Wi-Fi not working in macOS 13 Ventura on Mac.
Fix Wi-Fi Not Working in macOS Ventura
Getting a good hang of the problem upfront can save you plenty of time later. Hence, make sure to get it out of the way before moving ahead.
So, Why is Wi-Fi Not Working on My Mac?
While software bug is always the soft target for ill-functioning WiFi, you should never fail to complain to your network provider. At times, WiFi issue crops up due to occasional software glitch that is part and parcel of any software-driven device. On top of all, you can also put some blame on the VPN or the security software that may be coming in the way of your Wi-Fi network due to their nature of heavy lifting and could be preventing it from working properly. When you are dealing with so many usual suspects, it’s better to kickstart troubleshooting with a calm approach and keep trying all ways and means until you’ve got success.
1. Turn OFF/ON WiFi
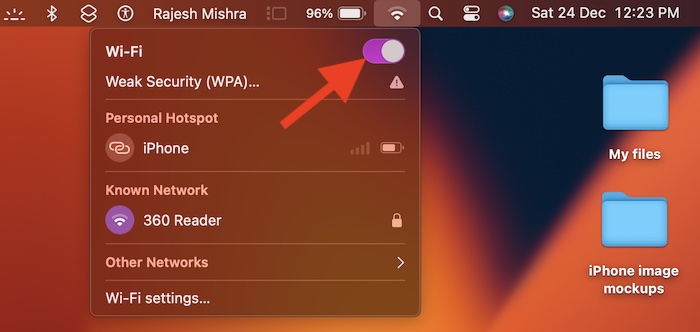
To get started, try turning off/on WiFi. Yeah, you read that right. This is exactly what I try whenever I find my WiFi network misbehaving without any rhyme or reason. Luckily, it enables me to resolve the issue straightaway more often than not.
Just click on the Wi-Fi menu at the upper right corner of the screen and then click on the toggle next to Wi-Fi. After waiting for a few seconds, turn on Wi-Fi and then play any song or online video to check if the Wi-Fi network is back on track.
2. Restart Your Mac
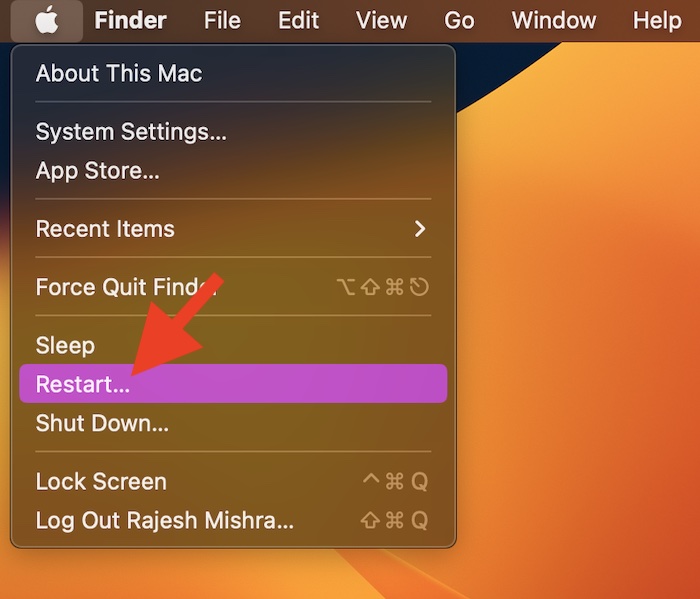
Another pretty easy but exceptionally effective solution that you can try to troubleshoot the Wi-Fi issues is to just restart your Mac. If the issue is due to a random software glitch, the soft reset will more likely resolve it. Hence, make sure to give it a shot.
Click on the Apple menu at the upper left corner of the screen and choose Restart in the menu. Once your Mac has rebooted, check if Wi-Fi has started to work normally.
3. Forget the WiFi Network and Reconnect to It
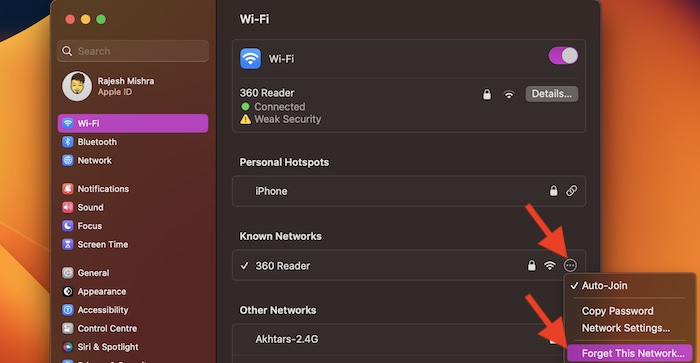
Should the issue persist, force your Mac to forget the Wi-Fi network and reconnect to it. A fresh connection may fix the problem.
Simply, click on the Wi-Fi menu at the upper right corner of the screen and choose Wi-Fi Settings in the menu. Alternatively, open the System Settings app on your Mac -> Wi-Fi. Now, click on the triple-dot icon next to the Wi-Fi network and choose the Forget This Network option in the menu.
After that, reconnect your Mac to the Wi-Fi network and check if you have gotten the better of the issue. If you have overcome the problem, you are good to go!
4. Restart Your Wi-Fi Router
Next up, I would recommend you restart your WiFi router. If the issue is from the Wi-Fi network itself, rebooting the router may get rid of it.
Simply, disconnect your Wi-Fi router from the power source. Then, wait for some time (4/5 minutes). After that, plug the Wi-Fi router into the power outlet.
5. Disable VPN or Anti-Virus Software Package
If you recently installed VPN (aka virtual private network) or any anti-virus software package, there is a good chance that it’s playing the spoilsport on your Mac. However, there is no need to fret over it as this is normal behavior.
6. Use the Built-in Diagnostic Tools
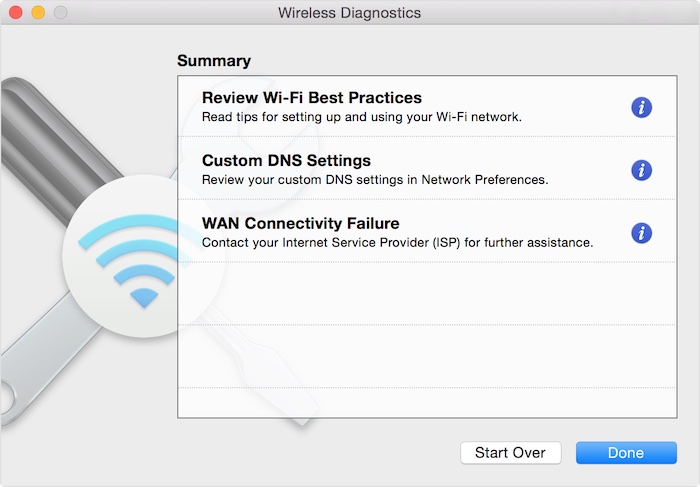
Still unable to figure out the reason that causes the issue? Why not use built-in diagnostic tools to get to the root of the problem?
Just click on the Wi-Fi icon in the menu bar or control center and then check for a menu item called Wi-Fi recommendations. If the Wi-Fi recommendations appear in the menu, your Mac has found an issue and accordingly offered up suggestions to fix it. To use wireless diagnostics, press and hold the Option key on your keyboard while clicking on the Wi-Fi in the control center or the menu bar. After that, select Wireless Diagnostics from the menu and then analyze the wireless environment.
7. Contact Your Wi-Fi Network Provider
Now, it’s time to contact the network provider and enquire about the issue you are facing. If the network is going through an outage or facing any technical glitch, you can’t do anything but wait until the issue has been resolved.
8. Update Your Wi-Fi Router
If it’s been a while since you updated your Wi-Fi router, I suspect the devil could very well be inside the outdated version of the software. Therefore, try updating the Wi-Fi router at the earliest.
9. Update Software on Your Mac
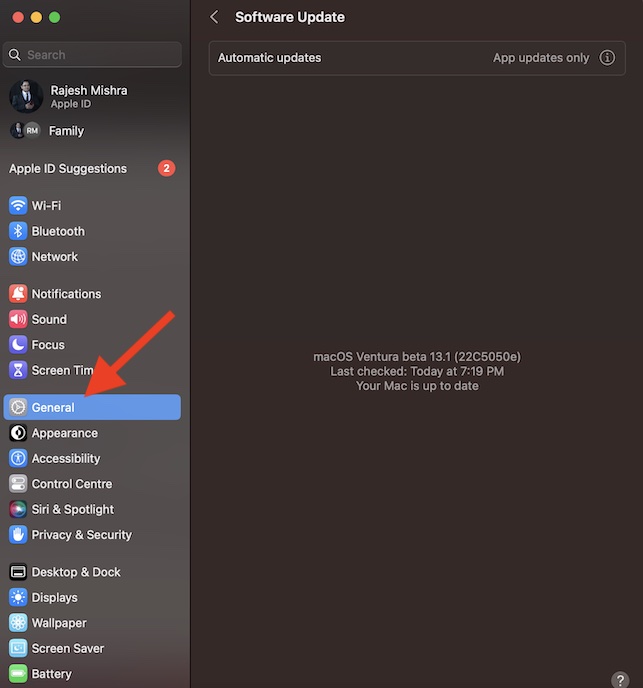
No solution as yet? Bother not, there is a high chance that the Wi-Fi not working is due to a hidden software bug. The good thing is most macOS updates keep coming with a ton of bug fixes and performance improvements. So, just updating your Mac may help you overcome the problem.
Then, open the System Settings app on your Mac. Alternately, click on the Apple menu at the top left corner of the screen and choose System Settings in the drop-down menu. Now, click on General and hit Software Update. Once your Mac has checked for the software update, it will offer you the option to download and install it.
Before going ahead with the update, connect your Mac to a power source and also ensure that the network is strong.
Wrap Up…
So, that concludes this detailed guide about fixing Wi-Fi networking on Mac. I hope the issue is finally behind your back and that Wi-Fi has started to work smoothly all over again. As these very set of solutions has worked for me and many other Mac users, I’m optimistic about their effectiveness. That said, make sure to let me know your feedback and more importantly which one of them has worked for you. Read more: Enable Advanced Data Protection for iCloud on iPhone, iPad, and Mac
