In this situation, Microsoft Family Group feature comes handy, you can add separate family member account in Windows 11 PC. Once done, your family member will have its own personal workspace which includes personalized desktop, separate browser, file manager, One Drive and even more.
As a results, all the family members that you have added can work in their individual workspace on the same PC ensuring the privacy of each other.
We have already covered blog post on how to add new user account in Windows 11 and Local account in Windows 11 with Microsoft Account, but the steps to add a family member account in Windows 11 is different.
In case, you have recently upgraded to Windows 11 PC and wondering how to setup Family Member account in Windows 11, then here’s what you need to do:
Add Family Member to Windows 11 using Settings App
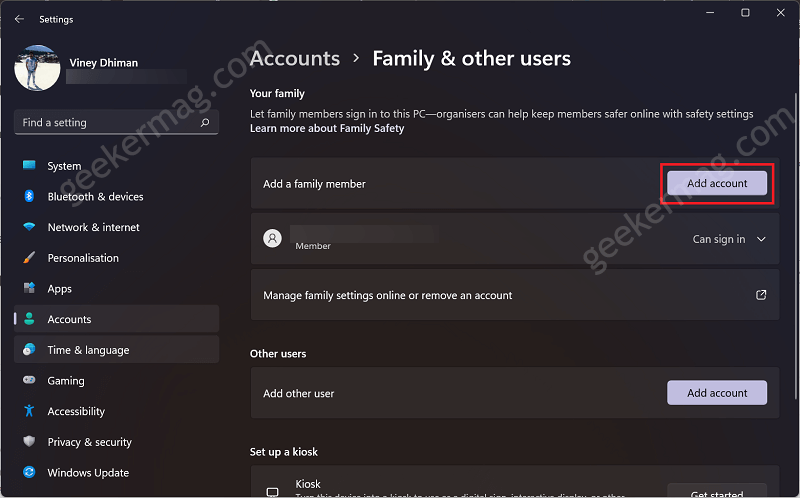
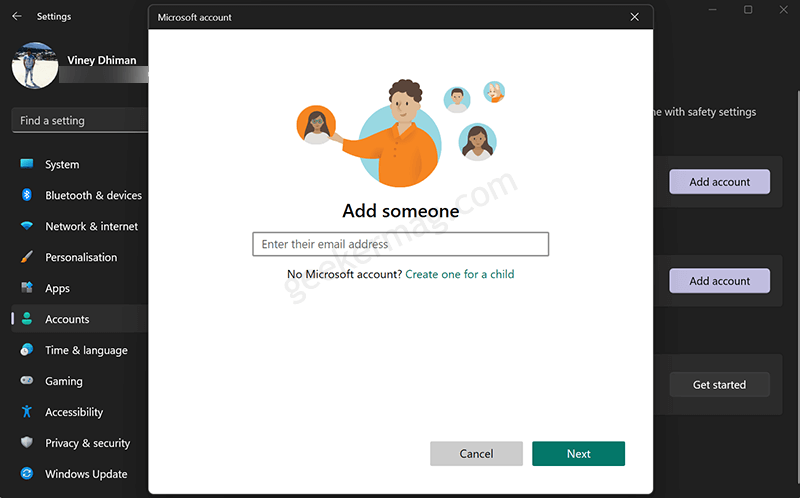
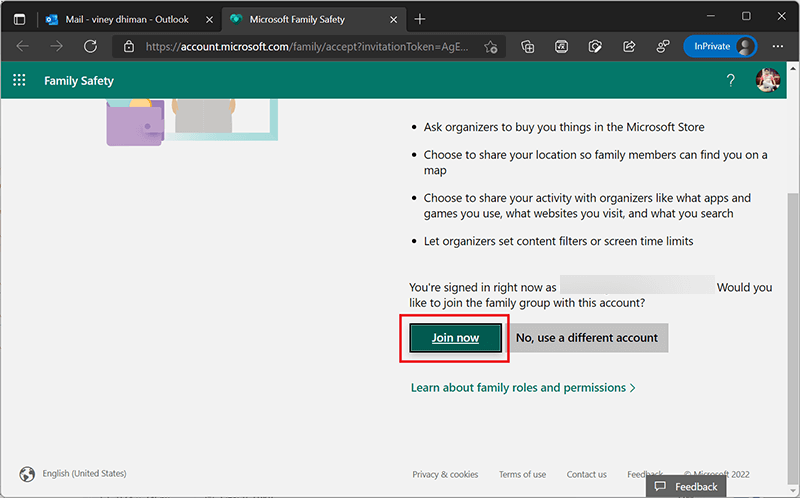
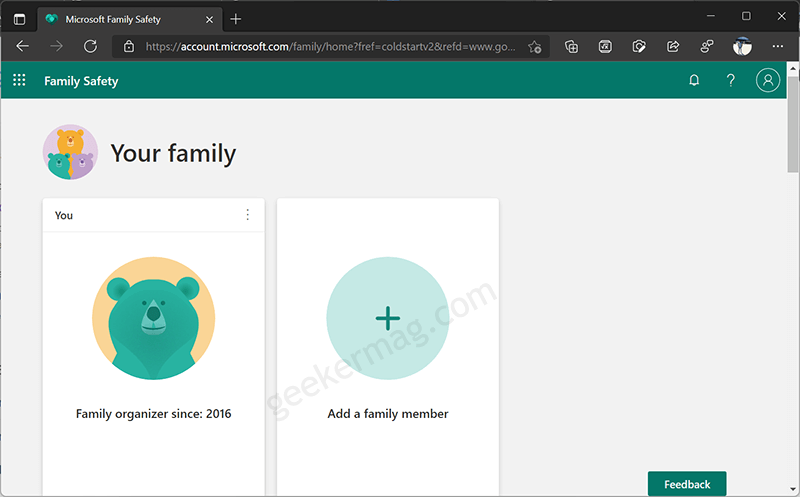
Launch Settings app in Windows 11 PC. For that, right-click on the Start button and select Settings from the menu. In the Settings app, you need to select Account > Family & other users. Under Your family section, click on Add account button available next to “Add a family member“. Enter email address of the family member that you want to add and click Next. You might be interested in reading how to create and add child account in Windows 11. In the next, screen you need to add role for particular family member. You will see two options: Member and Organizer. Select the option depending on your choice, click Invite. Head over to email service and click on Join Now button. You will be redirected to Microsoft Family page, click on the Join now button. Instantly, you will be redirected to your dashboard.
Add Family Member to Windows 11 using Family Dashboard
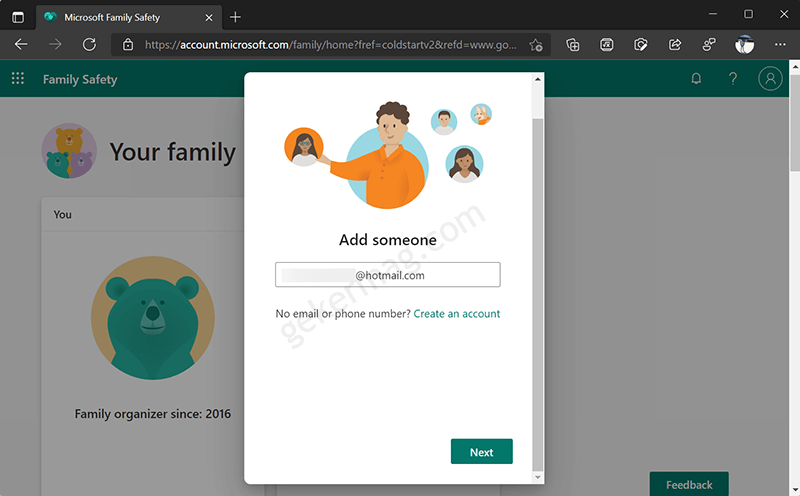
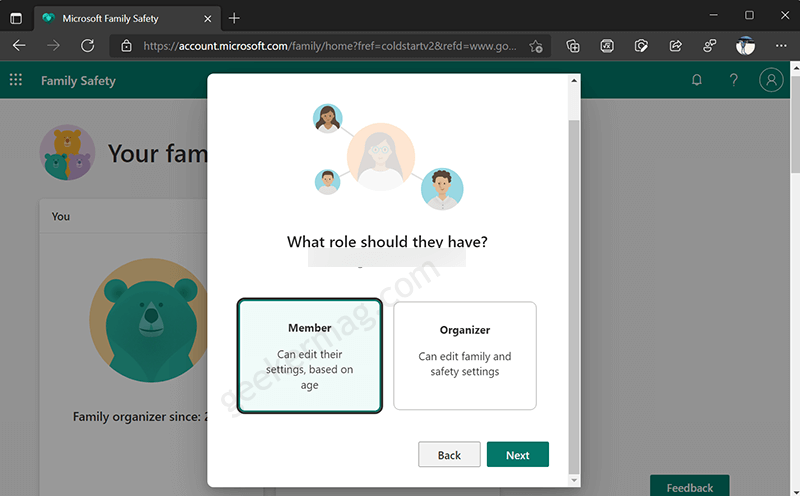
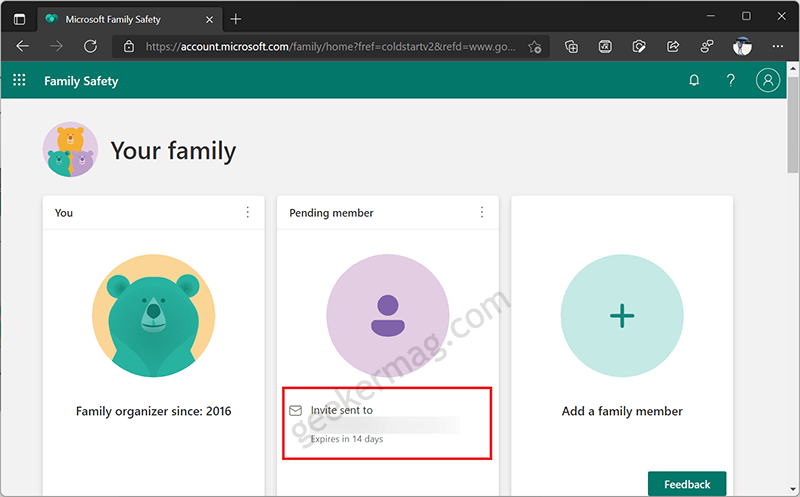
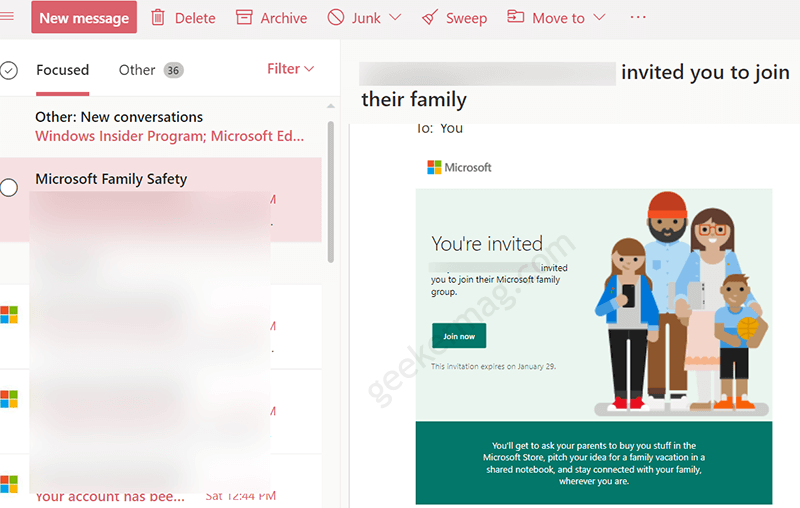
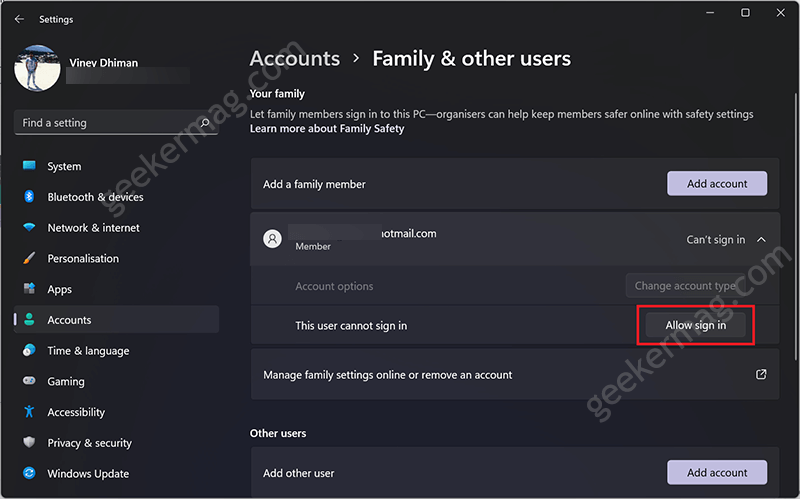
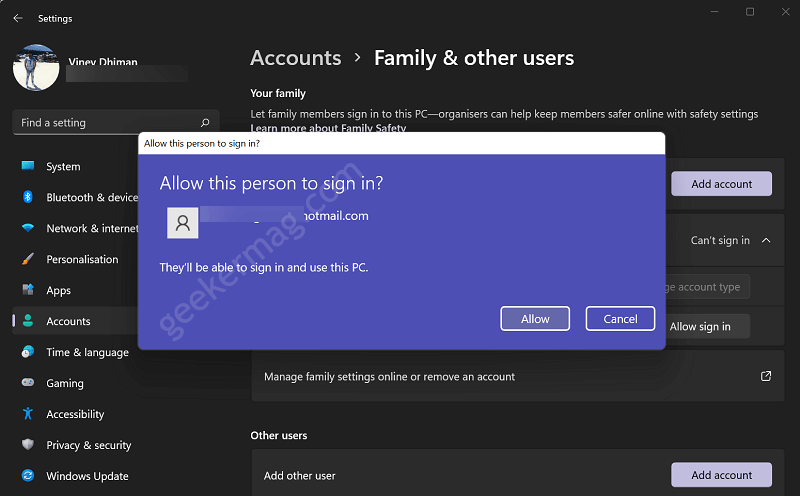
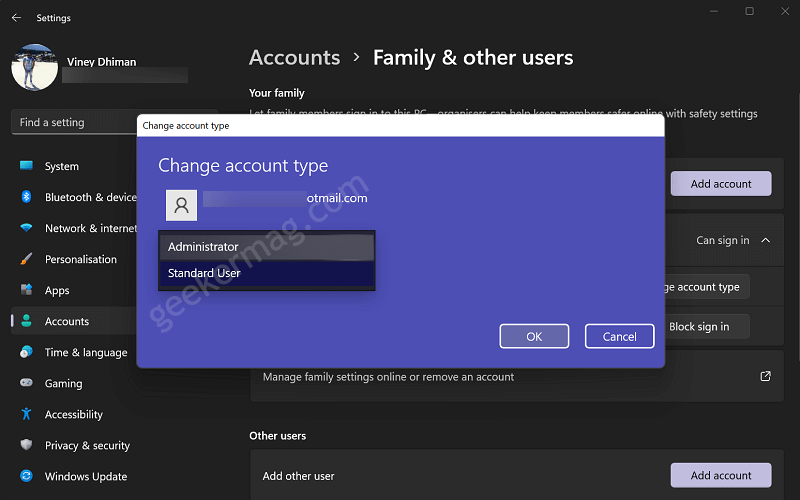
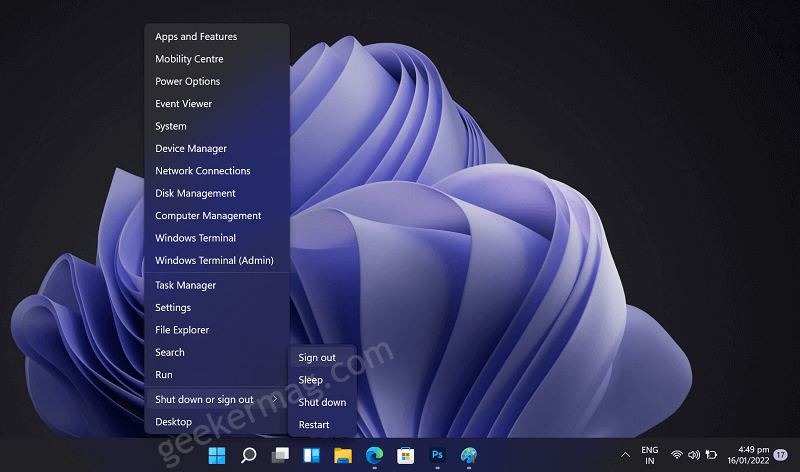
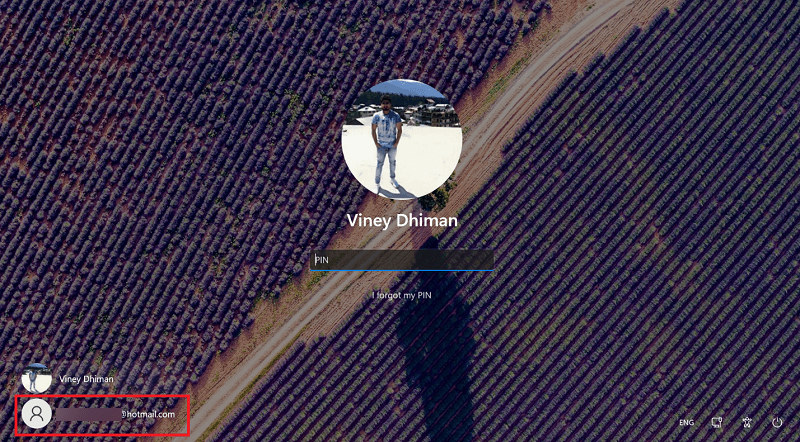
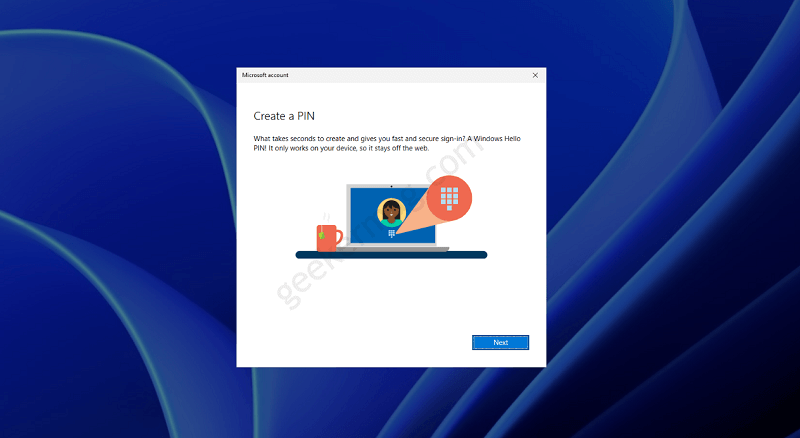
Launch Web browser and visit Microsoft Family Safety website. Click on the Add a family member option. Enter email address of the family member that you want to add and click Next. In the next, screen you need to add role for particular family member. You will see two options: Member and Organizer. Select one depending on your requirements. Next, fill the captcha and continue. Now invitation will be sent to email address of family member that you have added above. Head over to email service and click on Join Now button. You will be redirected to Microsoft Family page, click on the Join now button. Instantly, you will be redirected to your dashboard. The steps discussed below are common for both methods discussed above. Launch Settings app by pressing WIN + I key combo and then select Account > Family & other users. Under Add a family member section, you will start seeing the family account. You will find a status i.e. “This user cannot sign in“, click on the Allow Sign in button. A dialog box will appear, asking for the confirmation click ok Allow button. This will successfully add a Family member account in Windows 11. At this point, the account you have added is a Standard account. In case, you want to make administrator, then click Change account type button. A dialog box will appear, using Account type drop-down select Administrator. To setup new user profile for the family member that you have added, sign out from admin account. For that, right-click on the Start button > Shut down or sign out > Signout. In Windows 11 login screen, you will find Microsoft account email listed on the bottom left corner, select one. Follow on-screen instructions, you will be asked to enter password of the email account, after that set PIN for that account. Once everything is done, you will see Windows 11 Homescreen.
Remove Family Member Account in Windows 11 PC
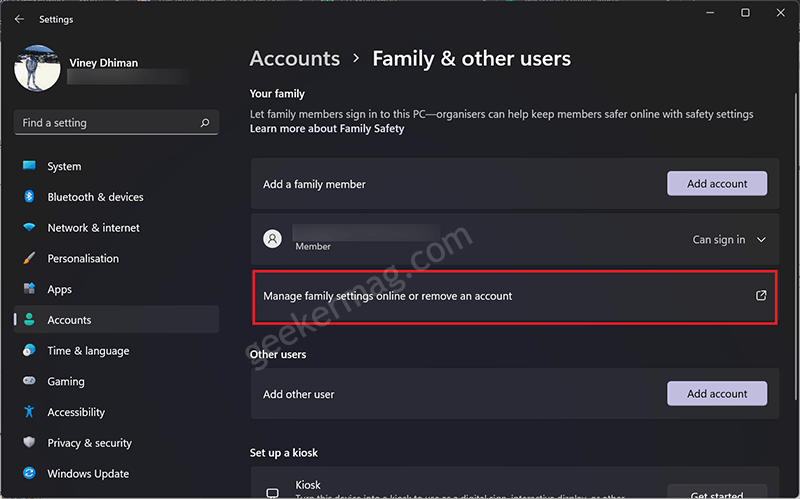
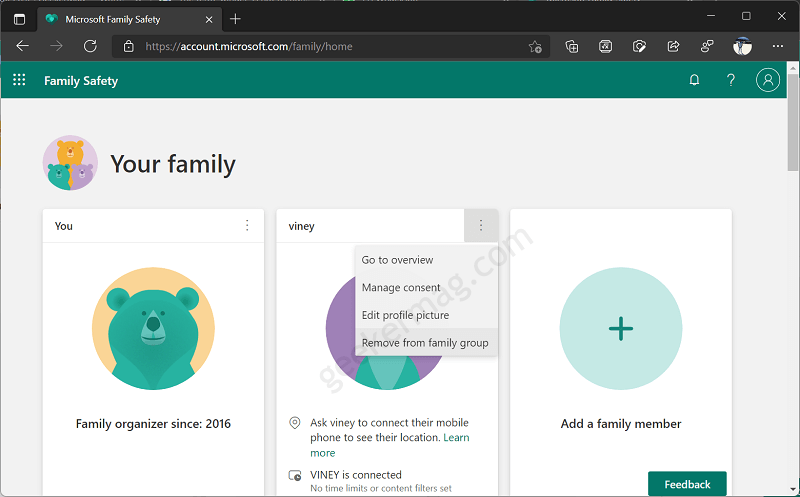
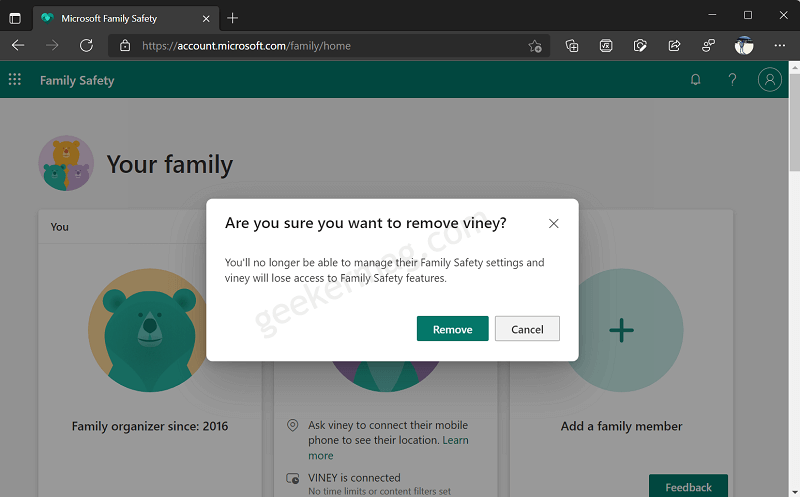
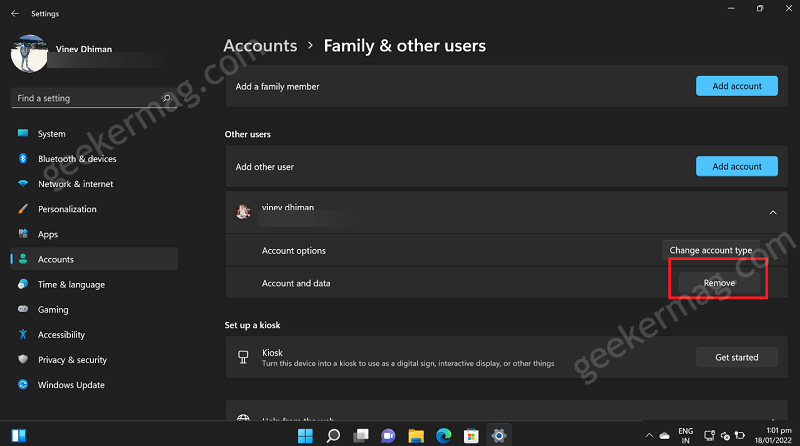
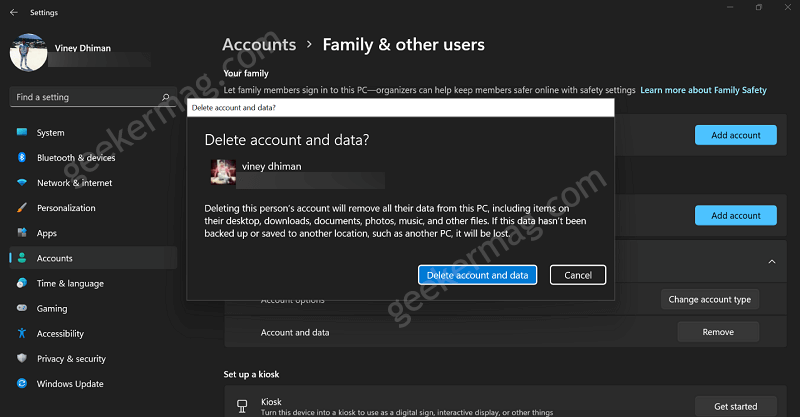
At any point, you wan to remove family member account from Windows 11 PC, then it is also possible. Here’s how you can do that: Launch Settings app by pressing WIN + I key combination. Select Account > Family & other users. Here on the right side, locate the family member account (listed under “Add a family member“). Under this, click on the option that reads “Manage family settings online or remove an account“. This will take your Family safety dashboard. Alternatively, click this link to directly visit Family safety dashboard. Here, locate the account, click on the three dots icon and select Remove from family group. A dialog box will appear asking for the conformation, click Remove button to continue. Instantly, the account will be removed from Family Group. After doing this, if you relaunch Settings app, the family group account will no longer appear under Family accounts. In case, you have added one of the other user account to Family group, then after you delete family account, the same account will start appearing in the Other user account section. Here, click on Remove button. A dialog box will appear asking for the confirmation, click Delete data and account button.
