Skype is people’s choice when it comes to making videos calls, both professional and personal for around 15 years. It was acquired by the Microsoft some time ago. It has lots of useful features that help in making conversation easy. Call Recording feature was a most anticipated feature of Skype. Fortunately, the company has finally introduced it around 15 years after it was launched. The native call recording feature is implemented on various version of the Skype app and let user record both voice and video calls That means, there is no need to take help of the third party skype recorder to record calls. Skype’s Call Recording feature is cloud-based and let users access call recording across the devices including Windows, Mac, Android, iOS, and even the Linux. Some users might not find recording skype video calls feature handy as it’s against their privacy. For backing this thing, the company mentioned in the announcement post that, whenever you or your friend start call recording, everyone in the call will get the notification that your call is being recorded. Fair right? Call recording will merge everyone’s video accompanied by screen sharing happened throughout the call.
Steps on Recording Skype Video Calls
- Launch Skype on your Windows 10 or Mac
- Choose the Contact to whom you want to call. You can record both Audio and Video calls. It is your wish what call time you want to record.
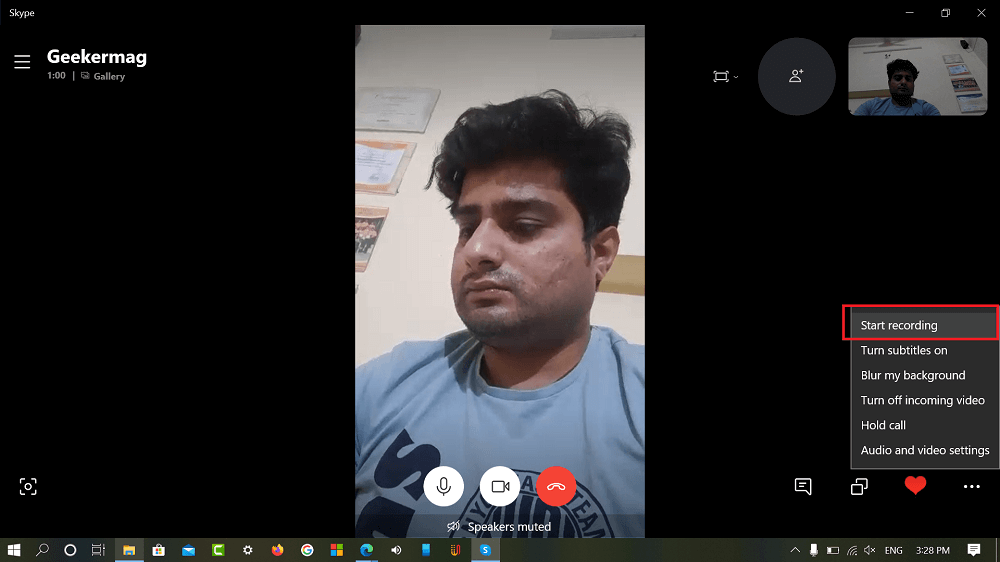
- When you’re on the call: On Desktop (Windows & Mac) Click on the + (Plus) icon available on the bottom right corner. This will open the quick menu; here you need to select ‘Start Recording‘ option. On Mobile (Android and iOS) Tap on the + (Plus) icon available at Center bottom of the screen. Next, tap on the ‘Start recording‘ icon.
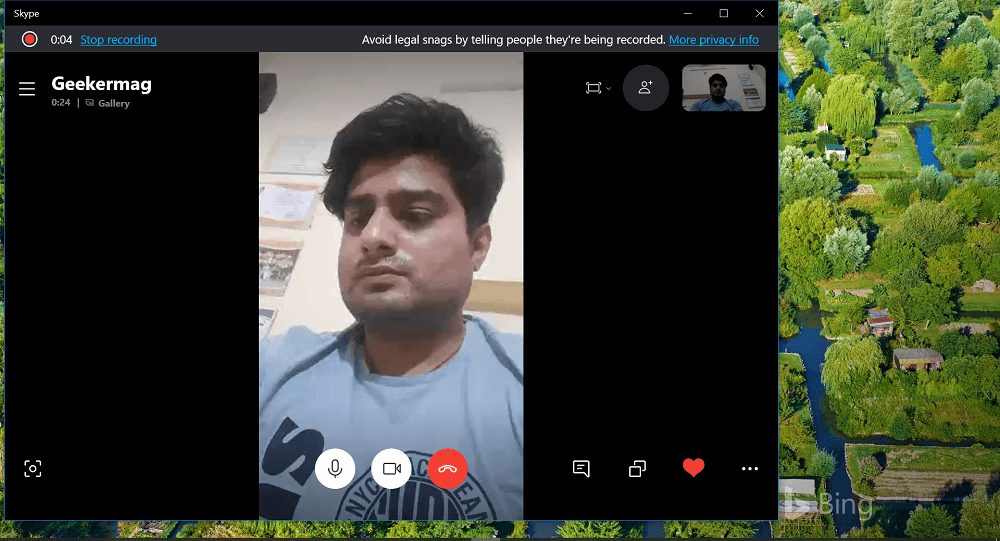
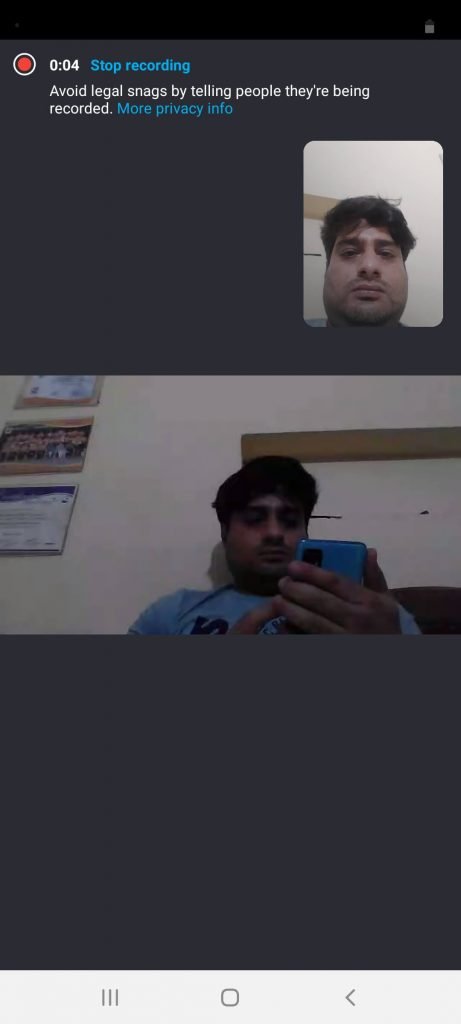
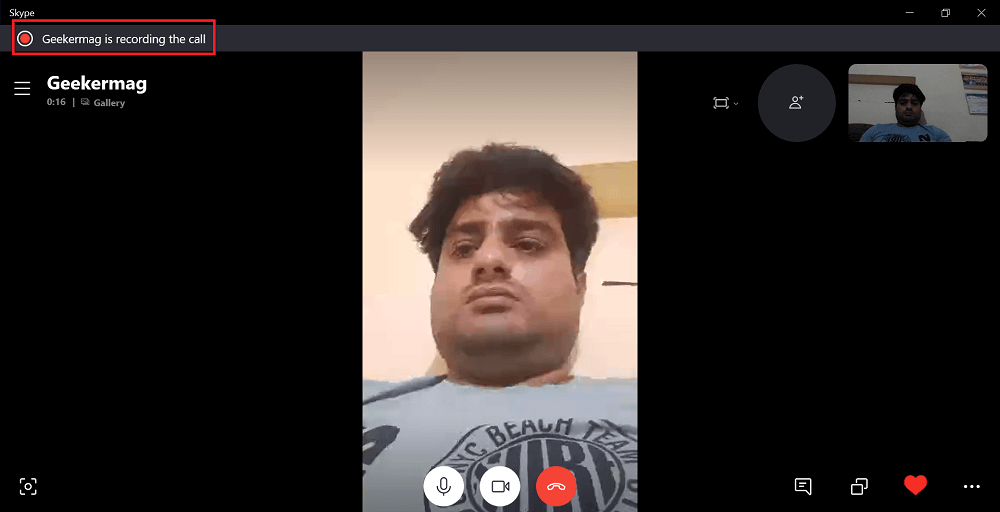
- Once you start recording, you will see the banner at the top with a message which reads “Avoid legal snags by telling people they’re being recorded.“ On Desktop (Windows & Mac) On Mobile (Android & iOS) While on the other side, all the people in the call will see a banner telling that you’re recording this call. Suppose I’m calling my friend and I have started recording the call, then they will see a message ‘Viney is recording.’ Check out the screenshot for a clear idea: On Desktop (Windows & Mac) For Mobile (Android and iOS) Once you stop call recording, it will be finalized and then posted on your chat window. The call recording (whether it is video or call) will be available for 30 days. Everyone in the call during the time recording can save the recording somewhere safe or locally. You can also share the recording with anyone in your contact during the 30 days.
Download Skype Recording
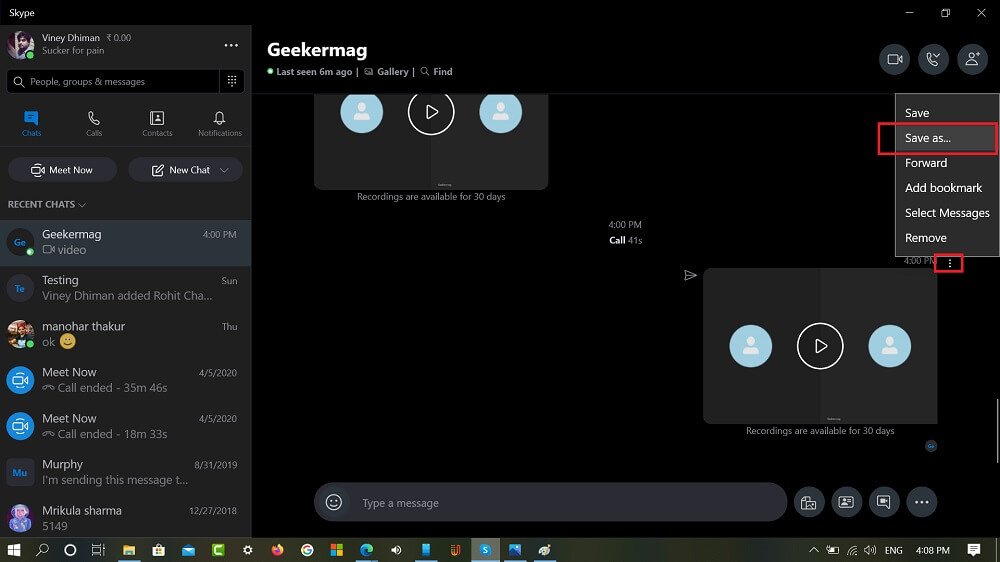
To download and save Skype video calls to your computer. Here’s what you need to do: On Desktop (Windows & Mac) In the chat window, right click on the recording call and from the menu select:
Save to Download – If you want to directly download it to downloads folder on your computerSave as – If you’re going to rename the file and save it somewhere else.
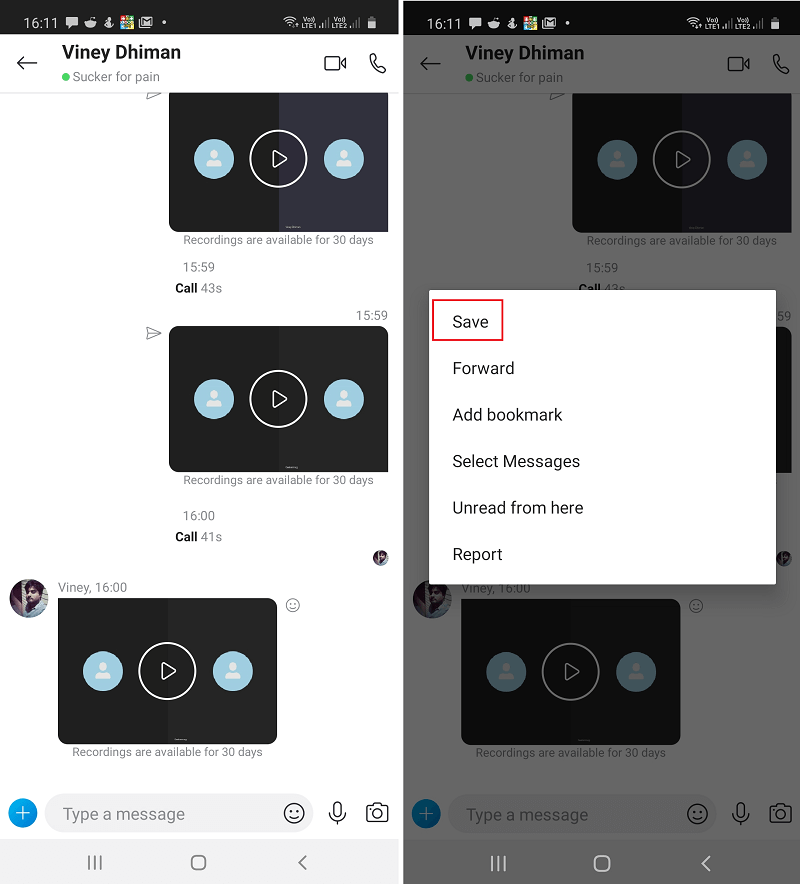
On your Android and iOS device, you need to long tap on the call recording, and select Save from the context menu.
Share or Forward Skype Recording
On your Windows and Mac, chat window, right click on the recording call and from the menu select Foward. This will open the Foward dialog box showing you the list of friends. Here, type the message which you want to send with the message and click on the Send button next to the name of a friend. On your Android and iOS device, long tap on the recording and select Forward from the menu. In the next screen, choose the friend to whom you want to send the recording and tap on the Send button available on the upper right corner. You might love to reads our tutorial on How to Record Zoom Video Meeting What are your thoughts about Skype Native Call Recorder feature? Find this blog post on how to record Skype video calls handy? Need further assistance, feel free to ask us in the comments.
